Splitting and Merging Objects
Options to split clustered objects or to merge selected objects are available in the Edit selection box for modifying multi-ROIs.
Split and Merge options
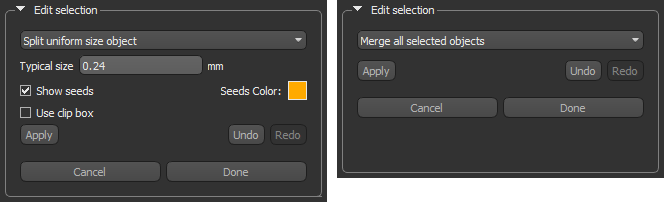
The following controls are available for Split and Merge operations.
|
|
Description |
|---|---|
|
Apply |
Applies a split or merge operation, which will modify the number of objects in the current multi-labeled region of interest. |
|
Undo |
Undoes the last applied operation. |
|
Redo |
Redoes the last undone operation. |
|
Cancel |
Cancels all split or merge operations that were previously applied. |
|
Done |
Applies all the changes you made to the multi-ROI. |
The Split operation can be applied to separate objects if they are clustering. You should note that whenever you attempt to split a clustered object, you must first enter the parameters that define the seed points. Seed points are identified through a distance map and can be constrained within a bounding box. All features self-contained within the seed point contour lines will be split from the cluster.
|
|
Description |
|---|---|
|
Typical size |
Determines the smallest part or feature of the clustered object that will be included in the segmentation. You should note that the typical size can be defined as the measurement from the seed point contour lines to the border of the clustered object. |
|
Show seeds |
After clicking this button, a distance map will be calculated automatically to enable the segmentation of the clustered object. You must then click on a feature within the clustered object to show the seed point contour lines. You can adjust the contour lines of the seed points to define the typical size of features within the clustered object by clicking outside or inside the contour lines. NOTE Clicking outside the contour lines will result in smaller-sized features being included in the segmentation, while clicking inside will exclude smaller-sized features from the segmentation. |
|
Seeds Color |
Lets you choose the color that will be applied to the seed. |
|
Use clip box |
You can use the clip box to constrain the area in which the distance map used to define the seed points will be calculated. |
- Choose Split uniform object size in the drop-down menu in the Edit selection box.
- Do one of the following:
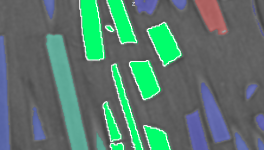
- Select the object you need to split in the Table view.
- Click the Pick Mode
 button and then select the clustered object that you need to split in a scene view, as shown below.

The object is highlighted onscreen and all other objects are dimmed.
- Check the Use clip box option and then define the area in which the calculation of the distance map will be constrained, optional.

NOTE The clip box does not define the limits of the Watershed segmentation. The main purpose of applying the clip box is to accelerate the computation of the distance map used to define the seed points.
- Check the Show seeds option.
A distance map is computed automatically.
- Choose a color for the seeds, optional.
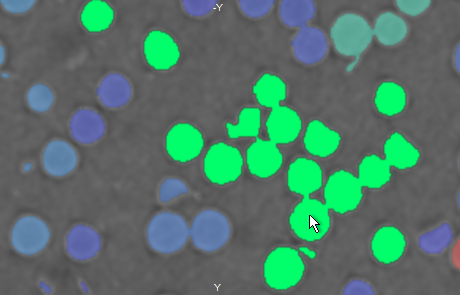
- Click a representative feature within the clustered object, as shown below.

The typical size is calculated automatically and the proposed segmentation is indicated by the contour lines of the seed points.
- Evaluate the results and modify the Typical size, if required.
Decreasing the Typical size will add smaller-sized features to the segmentation, while increasing the Typical size will remove smaller-sized features from the segmentation.
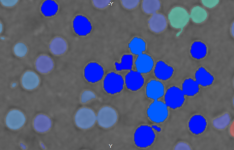
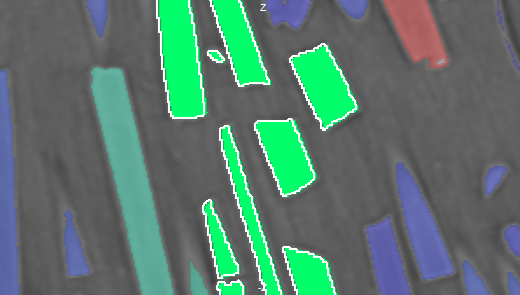
- Evaluate the proposed split on other slices and on other views of the dataset, as shown below on the YZ plane view.
- If the proposed split is satisfactory, click the Apply button.
The selected object is split automatically.
You can undo the split by clicking the Undo button and redo the operation by clicking the Redo button.
- Split additional objects, if required.
- Do one of the following:
- Click the Done button to apply all the changes you made to the selected multi-ROI. This includes all of the splits and merges that you applied.
- Click the Cancel button to reject all of the splits and merges that were applied.


A simple merge operation is available to merge selected objects in a multi-ROI.
- Choose Merge all selected objects in the drop-down menu in the Edit selection box.
- Select the objects that you need to merge as follows:
- Ctrl-click the objects you plan to merge on any view of the multi-ROI. The multi-ROI must be selected in the Data Properties and Settings panel and Pick mode must be enabled to select an object. To enter this mode, click the Pick Mode button.
- Ctrl-click the required objects in Table view.
The selected objects are highlighted onscreen and all other objects are dimmed.
- Click the Apply button.
The selected objects are merged automatically. You can undo the merge by clicking the Undo button and redo the operation by clicking the Redo button.
- Merge additional objects, if required.
- Do one of the following:
- Click the Done button to apply all the changes you made to the selected multi-ROI. This includes all of the splits and merges that you applied.
- Click the Cancel button to reject all of the splits and merges that were applied.


